 Save to Pinterest
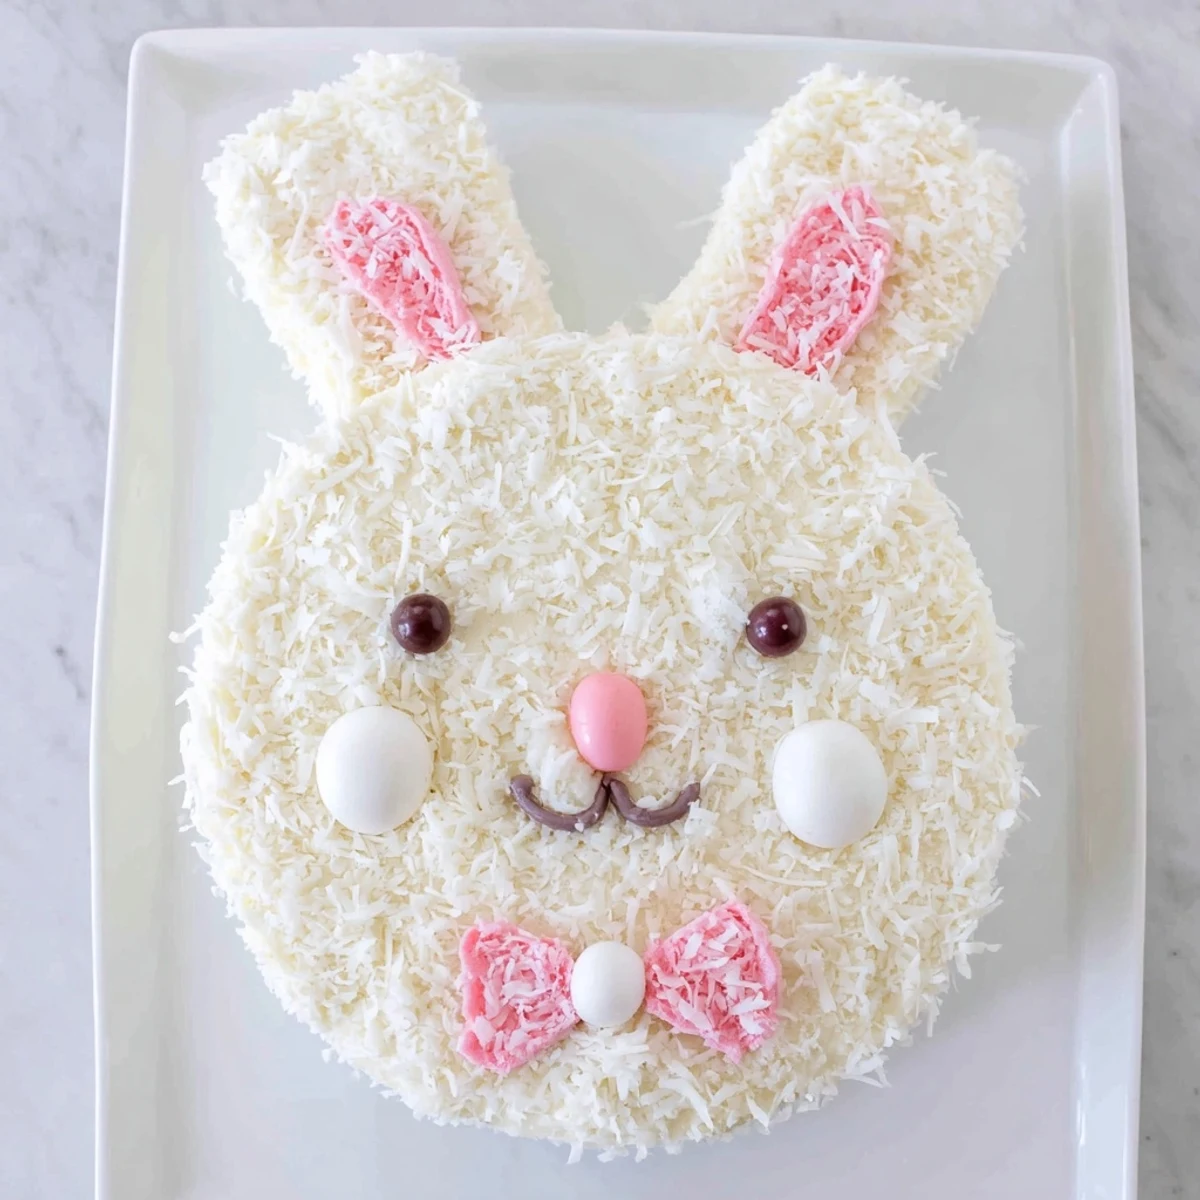
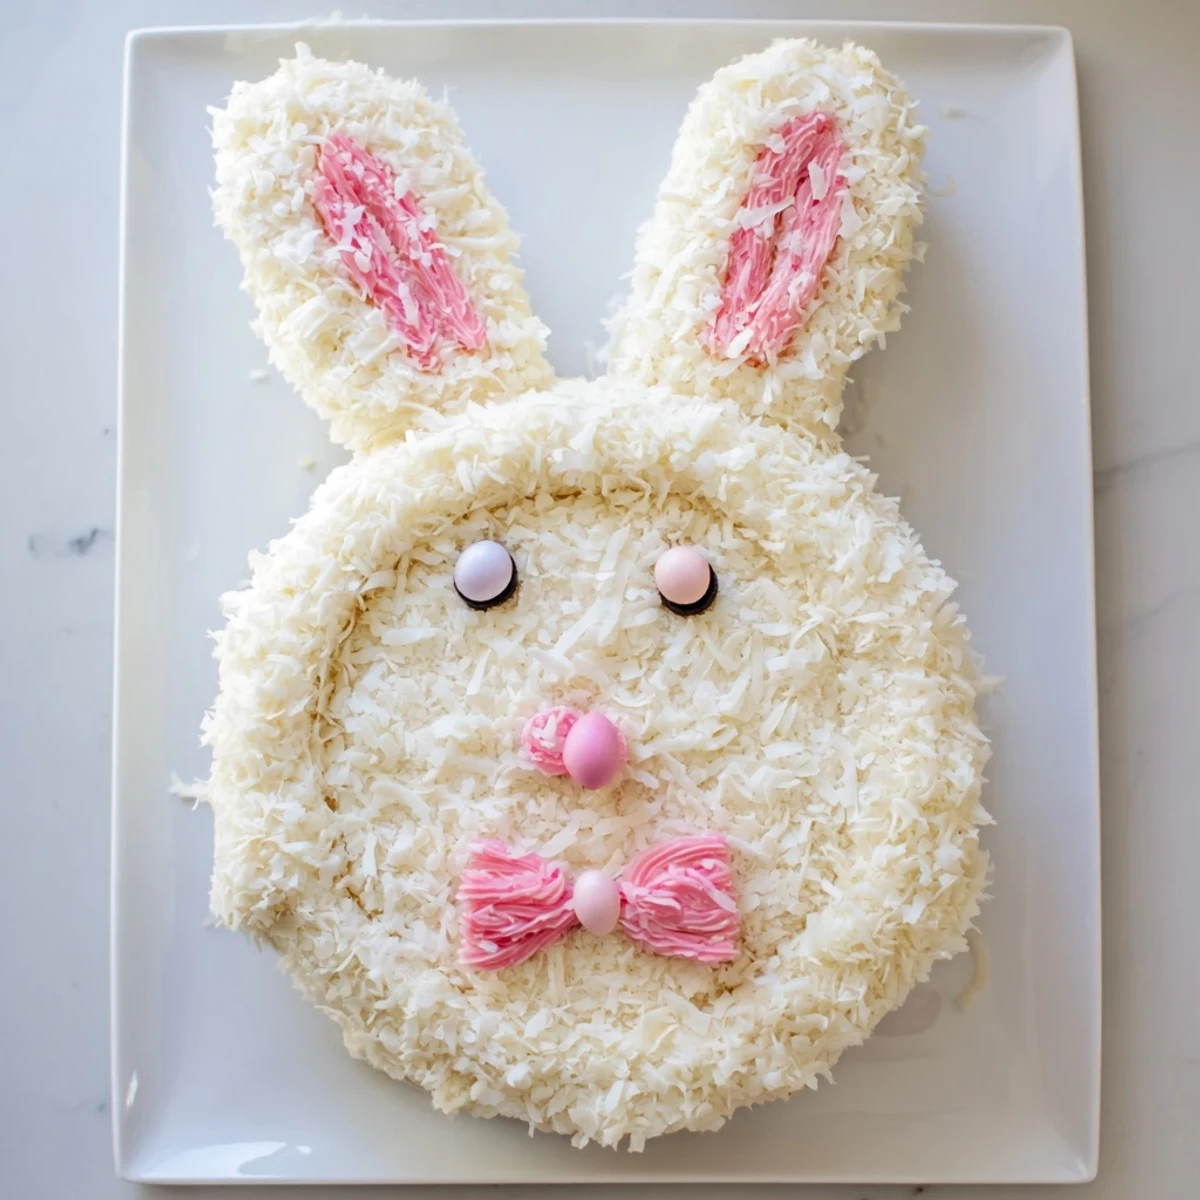
 This delightful bunny-shaped dessert brings whimsy to any spring celebration. Two moist vanilla cake layers are baked, then cleverly arranged—one round forms the face while the second becomes floppy ears and a charming bow tie. The entire creation gets coated in silky vanilla buttercream and rolled in shredded coconut for that signature fluffy texture. Pink-tinted coconut creates the inner ears, while jelly beans and fondant add personality with eyes, nose, and whiskers.
Perfect for Easter brunch, baby showers, or spring birthdays, this centerpiece takes about an hour from start to finish and serves twelve happy guests. The process is straightforward: bake the cakes, cool them completely, then carve and arrange before frosting. Children especially love helping decorate with candies and coconut.
My daughter's third Easter was the first time I attempted this bunny cake, and I spent the entire morning convinced I'd ruined it. The kitchen was covered in coconut, the ears kept sliding off, and I may have used way too much pink food coloring. But when she walked in and gasped at the 'bunny' on the counter, suddenly all the sticky mess felt worth it.
Last year I made three of these cakes for our neighborhood Easter potluck. By the time I arrived with coconut still clinging to my sweater, word had spread that 'the bunny lady' was coming. Now it's not really spring until someone asks if I'm bringing that cake again.
Ingredients
- All-purpose flour: 2¼ cups (280 g) provides the structure for a tender crumb that holds up when cut into shapes
- Baking powder and baking soda: 1½ tsp and ½ tsp respectively ensure the cake rises evenly without developing a weird dome
- Salt: ½ tsp enhances all the flavors and balances the sweetness
- Granulated sugar: 1 cup (200 g) sweetens perfectly while creating a tender texture
- Unsalted butter: ½ cup (115 g) softened brings richness and helps the cake hold its shape when decorated
- Large eggs: 3 room temperature eggs add structure and help the cake rise properly
- Whole milk: 1 cup (240 ml) creates moisture and tenderness in every bite
- Vanilla extract: 2 tsp rounds out the sweetness with classic flavor
- Unsalted butter for frosting: 1 cup (225 g) softened creates a silky smooth base that spreads beautifully
- Powdered sugar: 4 cups (480 g) sifted prevents lumps and gives the frosting the right stiffness
- Milk: 2–3 tbsp (30–45 ml) adjusts the frosting to the perfect spreading consistency
- Vanilla extract: 1 tsp adds depth to the buttercream
- Salt: A pinch cuts through all that sugar and balances the frosting
- Shredded sweetened coconut: 2 cups (140 g) creates that adorable furry coating everyone loves
- Pink food coloring: A tiny drop tints coconut for the inner ears and nose
- Jelly beans or mini candies: Perfect for the nose and eyes that give your bunny its personality
- Pink and white fondant or marshmallows: Shape these into ears that stand up tall
Instructions
- Preheat and prepare:
- Preheat oven to 350°F (175°C). Grease and flour two 8-inch (20 cm) round cake pans thoroughly so the cakes release easily later.
- Whisk the dry ingredients:
- In a medium bowl, whisk together flour, baking powder, baking soda, and salt until well combined. Set aside.
- Cream butter and sugar:
- In a large bowl, beat butter and sugar until light and fluffy. This takes about 3 minutes and creates the tender texture.
- Add eggs and vanilla:
- Beat in eggs one at a time, fully incorporating each before adding the next. Add vanilla extract and mix well.
- Combine wet and dry:
- Alternate adding flour mixture and milk to the creamed mixture, starting and ending with flour. Mix until just combined to avoid tough cake.
- Bake the layers:
- Divide batter evenly between prepared pans. Bake for 22–25 minutes, or until a toothpick inserted in the center comes out clean.
- Cool completely:
- Cool cakes in pans for 10 minutes, then turn out onto wire racks to cool completely. Warm cake will melt your frosting.
- Make the frosting:
- Beat butter until smooth. Gradually add powdered sugar, vanilla, salt, and enough milk to achieve a spreadable consistency.
- Shape the bunny pieces:
- Leave one cake round whole for the face. Cut the second round into two equal ovals for ears, and shape the remaining center into a bow tie.
- Arrange on the tray:
- Position the face, ears, and bow tie on a large serving tray. Leave enough space between pieces for easy frosting.
- Apply crumb coat:
- Spread a thin layer of frosting over the entire cake pieces. Chill for 20 minutes to lock in crumbs.
- Frost and add coconut:
- Frost the cake fully and press shredded coconut over the entire surface for fur. Work in sections for even coverage.
- Add pink details:
- Tint a small amount of coconut with a drop of pink food coloring. Gently press onto the inner ear sections.
- Finish the face:
- Use fondant or marshmallows for ear details. Place candies for the nose, eyes, and whiskers as desired.
 Save to Pinterest
 The year my niece helped me decorate, she insisted on giving the bunny three eyes because 'he needs to see everything.' That lopsided, extra-eyed bunny became the most talked about dessert at our family gathering and now every bunny cake needs a little character.
Making It Your Own
I've learned that chocolate cake works beautifully here if you want something richer. The coconut still looks like fur but the flavor becomes more decadent. One Thanksgiving I even made a pumpkin version with orange tinted coconut.
Assembly Secrets
When arranging the bunny pieces, take a photo of your layout before you start frosting. This way you can remember exactly how you wanted the ears positioned and how far apart to space the bow tie.
Serving And Storage
This cake actually tastes better on the second day after the flavors have melded. Store covered at room temperature for up to 2 days, or refrigerated for up to 4 days if your kitchen runs warm.
- Let refrigerated cake come to room temperature before serving for the softest texture
- Cut the face first so everyone gets some of the cute details
- Extra coconut on the serving tray hides any crumbs and makes it look like a little bunny nest
 Save to Pinterest
 Whether it's perfect or a little wonky, this bunny cake brings joy to the table. That's what matters most.
Recipe Questions & Answers
- → How far in advance can I make this bunny cake?
-
Prepare the cake layers up to two days ahead, wrapping them tightly in plastic once cooled. The frosting can be made ahead and refrigerated. Assemble and decorate the day you plan to serve for the freshest appearance.
- → Can I use chocolate cake instead of vanilla?
-
Absolutely. Chocolate cake pairs wonderfully with vanilla buttercream and coconut. The darker cake creates a nice contrast under the white coconut fur.
- → What can I use instead of fondant for the ears?
-
Large marshmallows sliced in half work beautifully for the inner ears. Pink candy melts, colored white chocolate, or even tinted buttercream piped onto the coconut can create the same effect.
- → How do I transport this bunny cake without damaging it?
-
Assemble directly on a sturdy serving board or cake drum that fits inside a large cake box. The coconut texture actually helps protect the frosting. Avoid covering with plastic wrap directly, as it will stick to the coconut.
- → Can I freeze the bunny cake before decorating?
-
Yes, wrap the cooled cake layers well in plastic and freeze for up to three months. Thaw overnight in the refrigerator before shaping, frosting, and decorating.
- → What's the best way to tint the coconut pink?
-
Place a small amount of shredded coconut in a zip-top bag, add one drop of pink food coloring, and massage until evenly distributed. Add more coloring drop by drop until you reach the desired shade.