Save to Pinterest
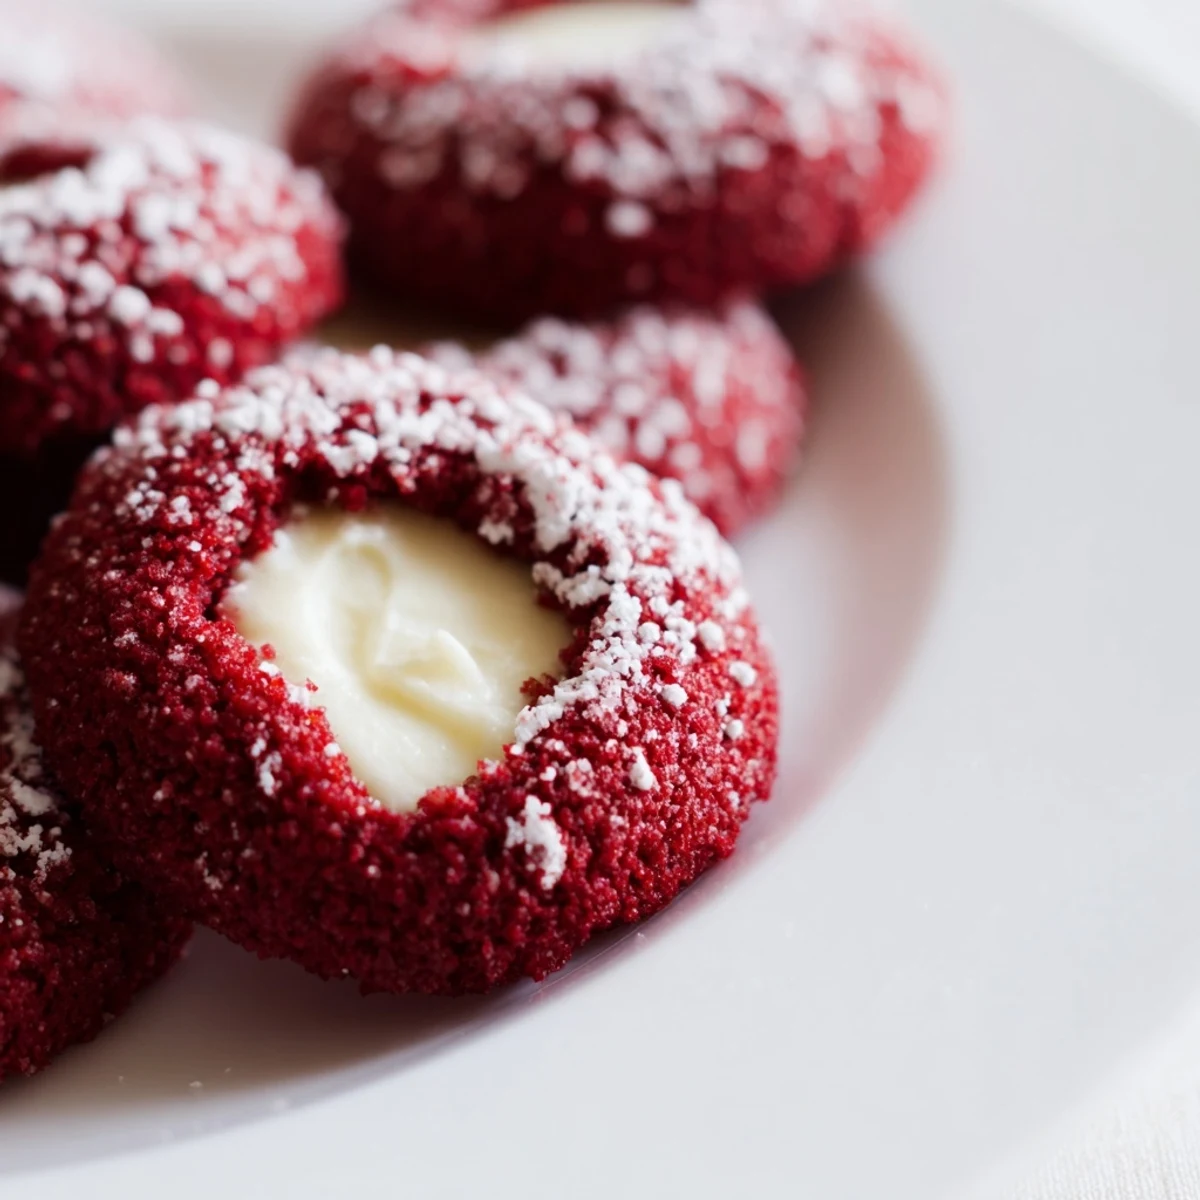
 These red velvet thumbprint cookies combine the classic cocoa-infused flavor with a velvety texture that melts in your mouth. The tender crumb comes from creaming butter and sugar until fluffy, while the signature red hue creates an eye-catching appearance.
The cream cheese filling adds a tangy sweetness that perfectly complements the chocolate notes. Each cookie features a thumbprint indentation filled with smooth, vanilla-spiked cream cheese that bakes into a luscious center.
With only 20 minutes of prep and a quick 12-minute bake, you'll have 24 stunning treats ideal for holidays, parties, or gifting. The dough rolls easily into balls and holds its shape beautifully during baking.
My sister was getting married and somehow I got volunteered to make the wedding favors. Two hundred cookies later, I discovered that red velvet thumbprints are surprisingly forgiving. Even the ones that cracked baked up beautifully, and guests kept asking which bakery I used.
I brought a batch to a potluck last winter and watched my friend Sarah take three before asking if I was secretly running a bakery side hustle. She could not believe something this velvety came out of a home kitchen. Now she texts me every December demanding her holiday fix.
Ingredients
- All-purpose flour: The backbone that keeps these tender without falling apart
- Unsweetened cocoa powder: Do not use Dutch processed or the red color will not pop properly
- Baking soda: Just enough to lift the edges while keeping centers soft
- Salt: Cuts through the sweetness and makes chocolate taste more like itself
- Unsalted butter: Softened to room temperature so it incorporates evenly
- Granulated sugar: Creates that perfect crackly exterior as the cookies bake
- Egg yolk: Adds richness without making the dough too wet
- Whole milk: Helps the food coloring distribute evenly throughout
- Vanilla extract: Pure vanilla makes the cheesecake filling taste like it came from a pastry shop
- Red food coloring: Gel coloring works better than liquid for this recipe
- Cream cheese: Use full fat brick cream cheese not the tub kind for the smoothest filling
- Powdered sugar: Sift it first or you will find lumps in your cheesecake centers
Instructions
- Get everything ready:
- Preheat your oven to 350°F and line two baking sheets with parchment paper before you start mixing anything.
- Whisk the dry team:
- In a medium bowl combine flour cocoa powder baking soda and salt until no cocoa lumps remain.
- Build the butter base:
- Beat butter and sugar in a large bowl for about 2 minutes until the mixture looks pale and fluffy like vanilla frosting.
- Add the wet ingredients:
- Mix in egg yolk milk vanilla and red food coloring until everything is combined and the dough looks dramatically red.
- Bring it together:
- Gently fold in the dry ingredients just until no white streaks remain overworking will make these tough.
- Make the filling:
- In a small bowl whisk cream cheese powdered sugar and vanilla until completely smooth then set it aside.
- Shape the cookies:
- Roll dough into 1 inch balls placing them 2 inches apart on your prepared baking sheets.
- Create the thumbprints:
- Press your thumb or the back of a teaspoon gently into the center of each ball to make a well for the filling.
- Fill and bake:
- Spoon about half a teaspoon of cheesecake filling into each indentation then bake for 11 to 13 minutes until edges look set.
- Cool them down:
- Let the cookies rest on the baking sheet for 5 minutes before moving them to a wire rack to finish cooling.
 Save to Pinterest
 Last Christmas my niece insisted on helping make these. She pressed her thumb into every single cookie even the ones I had already done. Those lopsided ones ended up being the prettiest batch and now she demands we make them the exact same way every year.
Getting The Red Right
I learned the hard way that liquid red food coloring can sometimes turn baked goods an odd brownish orange. Gel coloring gives you that vibrant restaurant red without changing the dough consistency. If you only have liquid add an extra teaspoon of flour to compensate.
Making Them Ahead
The dough balls freeze beautifully for up to three months. Just roll them press the thumbprints and freeze on a baking sheet before transferring to a bag. When you are ready to bake fill the frozen centers and add an extra minute to the baking time.
Serving And Storing
These actually taste better after chilling in the refrigerator overnight. The flavors meld together and the cream cheese filling firms up nicely. Serve them at room temperature for the best texture experience. They also make incredible gifts wrapped in bakery boxes with parchment paper between layers.
- Place a piece of white bread in the storage container to keep cookies soft longer
- Freeze the baked cookies unfilled then add fresh cheesecake filling when serving
- These disappear quickly so consider making a double batch for gatherings
 Save to Pinterest
 There is something deeply satisfying about pressing your thumb into warm cookie dough. It feels personal and tactile like leaving a little signature on something you made to share with people you care about.
Recipe Questions & Answers
- → What makes these cookies red?
-
The vibrant red color comes from adding one teaspoon of red food coloring to the dough. This traditional ingredient gives red velvet its signature hue that pairs beautifully with the cocoa powder.
- → Can I freeze the dough?
-
Yes, roll the dough into balls and freeze them on a baking sheet before transferring to a container. When ready to bake, add 1-2 minutes to the baking time. You can also freeze baked cookies for up to three months.
- → What other fillings work well?
-
White chocolate ganache makes an excellent alternative to cream cheese filling. You could also use raspberry jam, lemon curd, or even Nutella for different flavor variations that all complement the cocoa base.
- → Why do my cookies spread too much?
-
Overly soft butter or warm dough can cause excessive spreading. Ensure your butter is softened but not melting, and chill the dough balls for 15-20 minutes before baking if your kitchen is warm.
- → How should I store these cookies?
-
Keep them in an airtight container in the refrigerator for up to 4 days since they contain cream cheese filling. Bring to room temperature before serving for the best texture and flavor.